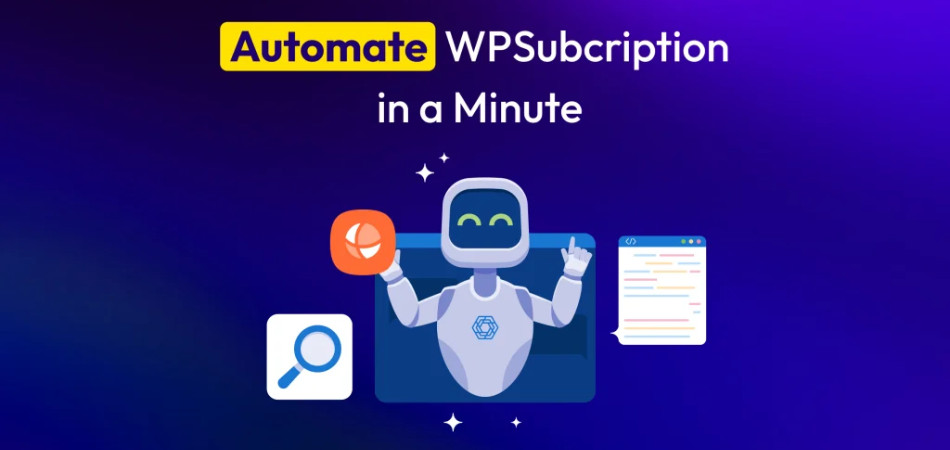
Hey! Are you a WPSubscription user? Good news for you. Now you can automate WPSubscription across 150+ action platforms using an automation plugin named Bit Integrations.
Don’t worry, you don’t need to write a single line of code to automate WPSubscription data. This is pure no-code automation for WPSubscription users like you.
If you have a subscription-based business, so you already know how tiring manual subscription management is. Manual subscription management is just a waste of time.
Copying WPSubscription details, updating CRM fields, or triggering follow-up emails by hand? Nope!
Table of Contents
There is a Better Way: Smartly Automate WPSubscription Data
With this powerful tool now, you can set up a fully working WPSubscription automation workflow in just a few minutes with 3 simple steps. In case you want to send the subscription data to Google Sheets, trigger an email, or notify your team on Telegram. It’s all possible without writing a single line of code.
Alright, let’s see how you can start automating your WPSubscription details! Before automating WPSubscription data, let us introduce you to Bit Integrations.
It’s WordPress’s number #1 most powerful no-code automation plugin. It helps to automate WPSubscription details and automate recurring payments in WordPress in case you are sending subscription details to Google Sheets, CRMs, email marketing tools, or messaging platforms like Telegram, Slack, etc.
How Bit Integrations helps you to automate WPSubscription Workflows
Bit Integrations is one of the most powerful, number #1 automation plugins in WordPress. It supports a total of 290+ Integrations.
Among them, 140+ are trigger platforms and 150+ are action platforms. With Bit Integration, just three simple steps, anyone can automate WPSubscription easily in a minute.
Behind the scenes, Bit Integration basically works with three simple steps
- Trigger
- Action
- Map the fields
Let’s talk about the trigger in Bit Integration.
A trigger is just something that starts your automation. It tells Bit Integrations, “Hey, something just happened. Time to do the next step!”
For example, a trigger is
- Someone filled out a form
- Someone ordered a product from your store.
- When someone purchases a subscription from your store
Let’s see what an action in Bit Integration
Okay, so you know how a trigger tells Bit Integrations, “Hey, something just happened!”
Well, an action is what happens after that. It’s like saying,
“If this happens → then do this.”
For example:
- Someone filled out a form → Send their info to Google Sheets
- A new order comes in → Post a message in your Telegram group
- Someone purchase a subscription → Add them to your email list (like Mailchimp)
What is field mapping in Bit Integrations?
Alright, imagine someone fills out a form on your site. They enter their name, email, and phone number.
Now, you want to send that info to another place, like Google Sheets, Mailchimp, or a CRM.
But here’s the thing: Bit Integrations needs to know where each piece of data should go. That’s where field mapping comes in. That’s WPSubscription integration made simple.
Field mapping means connecting your trigger to the right spots in the app you’re sending the data to. You’re basically saying, “Hey Bit Integrations, take this and put it there.” For example:
- This is the name → put it in the ‘Full Name’ column on my Google Sheet.
- This is the email → send it to the ‘Email’ field in Mailchimp
Easily Automate WPSubscription Using Bit Integration
Getting started is super easy! Just pick the WPSubscription as your trigger in Bit Integrations. Then choose where you want to send your subscription info, like Google Sheets, a CRM, or any of the 150+ tools that Bit Integrations works with.
Now, let’s check out some cool ways you can use this. Here are 5 easy and most popular WPSubscription automations you can try:
- Automate WPSubscription to Google sheet
- Automatically send your subscription to a Telegram group
- Automate WPSubscription to Mailpoet
- Add your subscriber to MailerLite automatically
- Automatically send your WPSubscription details to Brevo (Sendinblue)
Let’s start the first automation: Automate WPSubscription to Google Sheets
So, you’ve got a subscription product set up on your WordPress site using WooCommerce, right? And now you’re thinking about, “how can I send all my subscription info to a Google sheet without copy-pasting it every time?”
Good news: now you can automate WordPress subscription details to your Google Sheets. Let’s see step-by-step how easy it is.
Step 1: Install the plugin
Install and activate the Bit Integration plugin on your WordPress site

Step 2: Select the trigger
After installing and activating the Bit Integration plugin, go to the Bit Integration plugin.
Now, click on Create Integration and search, and choose WPSubscription as the trigger.
Now, select a task name. You can select your desired task from the following options: Subscription Activated, Subscription Expired, Subscription Cancelled, or Subscription Status Changed admin alert.
After choosing your desired task, click the “Fetch” button. While the “fetch” button is spinning now, go ahead and create a test subscription on your site. This helps Bit Integration catch the data and set things up properly!

Step 3: Set the desired action
After successfully fetching, now search and select the Google sheet as an action.

Step 4: Provide Google account details
After choosing Google Sheets as your action, you’ll need to connect your Google account.
Just enter your Google Client ID and Client Secret (you can get these from the Google API Console).
Paste them into the boxes, then click Authorize to link your account. And click Next.

Step 5: Map the fields
Once you’ve connected your Google account, just choose Google Spreadsheet, pick the worksheet, and select the header row.
Then, match your WPSubscription fields with the columns in your Google sheet. When you’re done, click Next and hit the save and finish button.

And that’s it, you’re done! After setting up the Google sheet integration, everything runs automatically.
Let’s say someone subscribes to a product on your site; their info, like email, name, plan name, subscription ID, subscription status, and everything, shows up in your Google Sheet automatically.
Bit Integrations supports multiple WPSubscription events, so you can track all kinds of subscription updates in real-time, like
- When the Subscription is activated
- When a subscription expires
- When a subscription is cancelled
- When the subscription status changes (admin alert)


Automate WPSubscription details to Telegram
Step 1: Select the WPSubscription task
Again, select the WPSubscription task name. And hit the “Fetch” button. While the “Fetch” button is spinning, make a test subscription. After successfully “fetching,” click on “set action.”
Step 2: Select the action
In this step, you can now search and pick Telegram as an action.

Step 3: Provide Telegram details
Now, provide your Telegram Bot API keys. (You can find and create your Telegram Bot API key from Telegram BotFather.)
Click the “Authorize” button and hit Next.

Step 4: Select the desired Telegram group
After successfully authorizing the Telegram bot, select the Telegram group where you want to send your subscription details.
And select the desired subscription details in the message box. You can use utilities and conditional logic for advanced automation. And click Next, save, and finish.

Ready your WPSubscription to Telegram automation. Now, when someone creates a subscription, their subscription details automatically go to your Telegram group.

Automate WPSubscription to MailPoet
Step 1: Select the WPSubscription as a trigger
Select the desired WPSubscription task again. And click the “fetch” button. After successfully “fetching,” click on set action.

Step 2: Select the action
Search and select MailPoet as an action.

Step 3: Select the MailPoet account
In this step, connect your MailPoet account to WordPress. Once you connect your MailPoet account to WordPress, click “Authorize.” After successfully authorizing, click Next

Step 4: Select MailPoet details
Select your MailPoet list. And map the fields between MailPoet. And click Next, save, and finish.

Ready your WPSubscription to MailPoet automation. Now, when someone subscribes to your product, MailPoet automatically adds a subscriber.


Automate WPSubscriber to MailerLite
Step 1: Select the WPSubscription task
Once again, go to the Bit Integrations dashboard and create Integrations. Search and select the WPSubscription and select your desired task. Click on the “Fetch” button. After successfully fetching, click on set action.
(While you see “waiting for form submission,” then create a test subscription.)

Step 2: Select the action
Search and select MailerLite as an action.

Step 3: Provide MailerLite account detail
In this step, now choose the MailerLite version and provide your MailerLite API token. And click “authorize.” And go to the next step.(You can find your MailerLite API token from MailerLite Integration.)

Step 4: Select MailerLite action
Pick your desired action on MailerLite. And map the field WPSubscription data to the right fields in MailerLite. And click Next, save, and finish.

Ready your WPSubscription to MailerLite automation workflow. Now, when someone purchases a subscription from your WordPress site, MailerLite Automatically adds a subscriber.


Automate WPSubscription details to Brevo (Sendinblue)
Step 1: Pick the WPSubscription task
After choosing the WPSubscription as a trigger, now choose the WPSubscription task name. And click on the “Fetch” button. (If you see “waiting for form submission,” then make a test subscription.) After successfully fetching, click on the Set action button.

Step 2: Set the action
Search and select Brevo (Sendinblue) as an action

Step 3: Provide your Brevo account details
Now, write the Integration name and provide your Brevo API key. Click “Authorize.” After successfully authorizing, go to the next step. (You can find your Brevo API key from Brevo API Console.)

Step 4: Select the Brevo list
Select your desired Brevo contact list and map the form fields to the Sendinblue field. After successfully mapping the fields, hit Next, save, and finish.

Awesome! Your WPSubscription is now connected to Brevo. So now, whenever someone makes a subscription on your site, Bervo will automatically add them to your contact list. You don’t need to do anything. Cool, right?


Conclusion
See? That wasn’t hard at all!
You don’t need to be a tech expert, and you definitely don’t need to write code. With Bit Integrations, automating your WPSubscription workflow is simple, fast, and completely beginner-friendly.
In case it’s sending subscription info to Google Sheets, adding the user to MailPoet or Brevo, or getting instant alerts on Telegram, you can do it all in just a few clicks. So, why wait? Go ahead, start your first automation now, with WPSubscription and let Bit Integration handle the subscription task!
You may also ask
Q: I can’t see my Telegram group while setting up the integration. What should I do now?
A: No worries! Just make sure you’ve added your Telegram bot as an admin in the group. Without admin access, the bot can’t find or send messages to the group.
Q: I couldn’t send a subscriber to my Brevo contact list. What should I do?
A: First, double-check that your Brevo integration is set up correctly.
If everything looks fine but it’s still not working, make sure you’re not using the same email address more than once. Brevo won’t allow duplicate emails.
Q: Can I send WPSubscription data to multiple tools at once?
A: Yes! You can definitely automate multiple tools.
But to do that, you will need to create a separate Integration for each tool. For example, one Integration for Google Sheets, another one for MailChimp, and a different one for Telegram.